

Hey,
So I am very excited about today’s Blogmas post because I am
doing a festive DIY. The idea of this DIY isn’t originally mine as I took
inspiration from many similar ideas on Pinterest. Pinterest is a GREAT website
for DIYs, and if you fancy making something this season, be sure to check it
out.
The DIY I am making today is frosted tealights, which is
basically tea light holders decorated with white glimmer (that’s looks so much
like snow/frost). The DIY is SO simple and cheap to make, as well as the fact
that it uses recycled jars.
If you’re a reader of my blog, you may remember that I did a
tealight DIY earlier this year, in February, using old tins and I know this is
similar but I could not resist showing you what I made! I hope you enjoy!
This DIY takes about 2 hours on average, taking in mind that
the PVA glue needs to set.
What you will need:
·
Old/used jars which have been cleaned out
·
White glitter, or another glitter of your choice
·
PVA glue
·
Masking tape, masking tape works so much better
than other tape because it comes off easier
·
Sponge/ paint brush
·
Spare glass
·
Scissors
·
Newspaper
·
Optional- decorative bits, for example ribbons
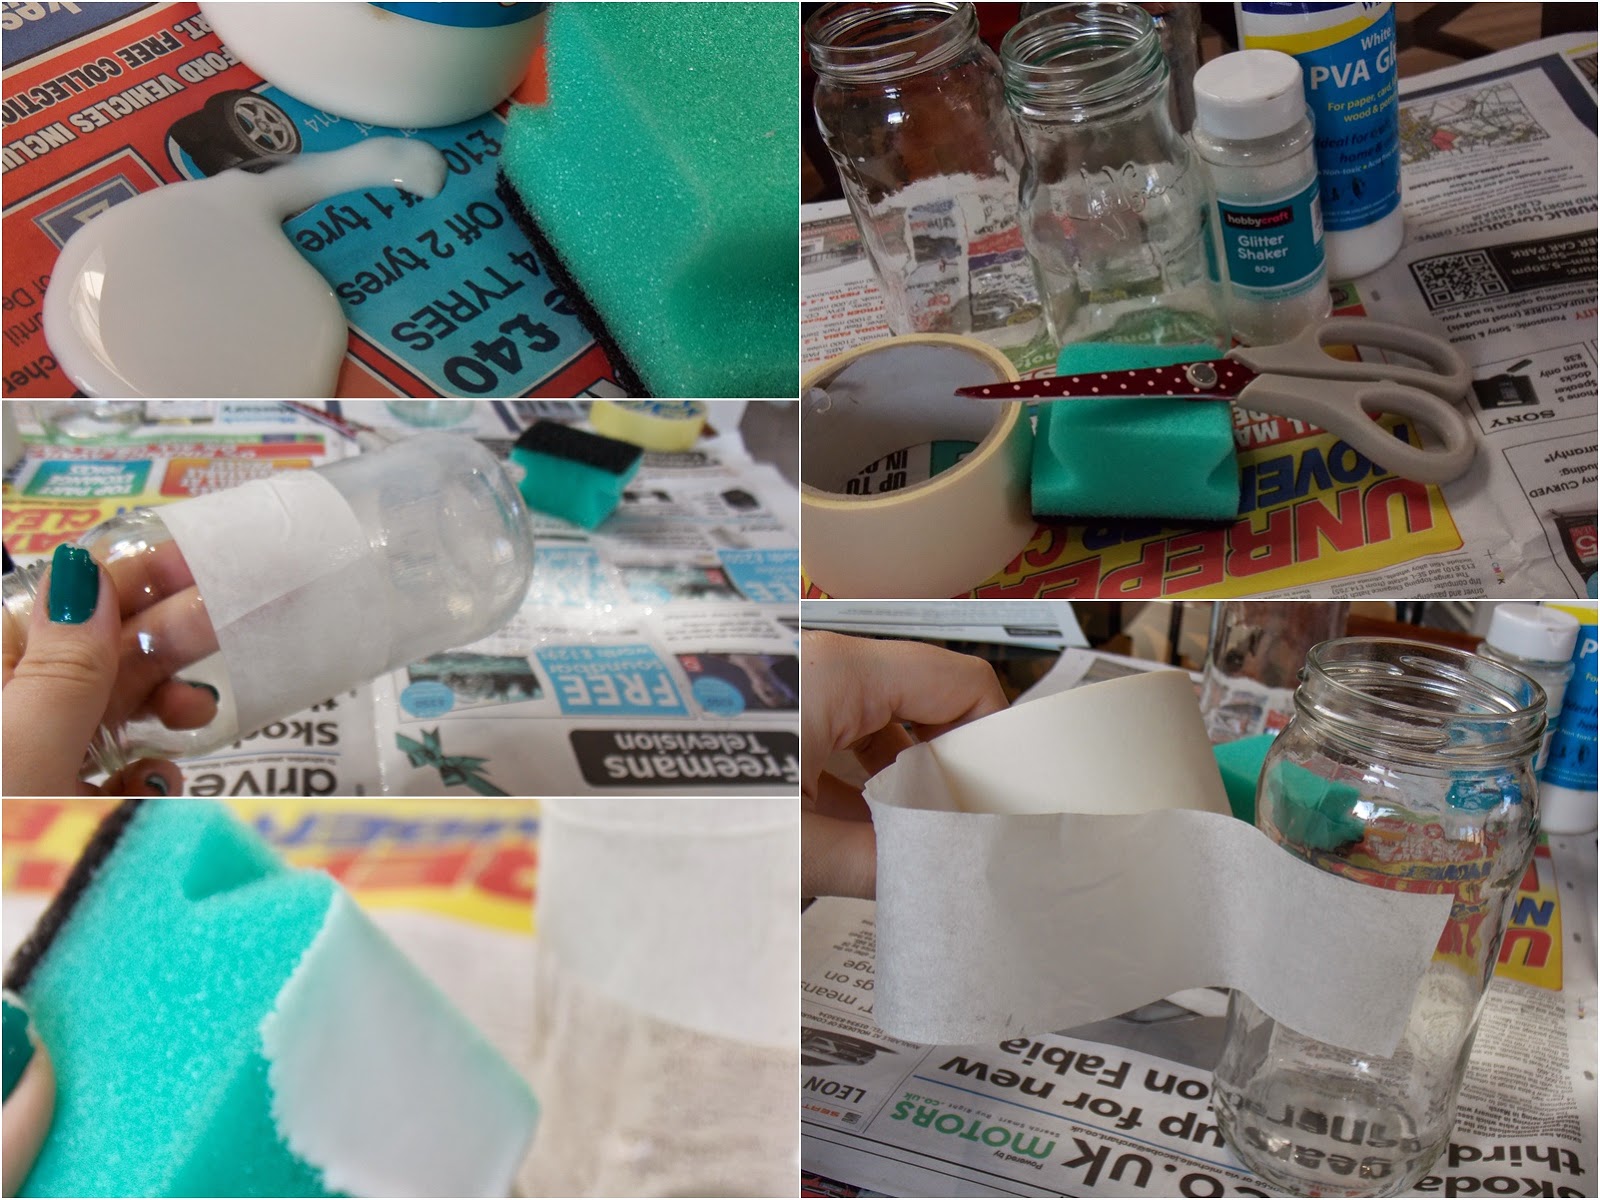
1.
Make sure your jar is clean and does not have
the label/ any label glue attatched. You can use any shape/ size jar depending
on what you have spare. Some ideas are old glasses, sauce jars, jam jars and Nutella
jars.
2.
Choose your first jar, take the masking tape and
choose how high up you want the glitter to come to. Then carefully wrap the tap
around, trying the get the line as level as possible as this will give you the
best result. If your jar is smaller at the top and some cuts into the masking tape.
3.
Now newspaper your work space.
4.
Next pour out some PVA and dip your sponge into
it. Don’t put too much glue on otherwise the glitter may clump.

5.
Pour some glitter into your spare glass, you
only need a little amount, and tip it onto a part of the glue. Then try and
pour the glitter back into the cup, repeat the process until the glued section
is covered in a thin layer of glitter.
6.
Leave the jar aside for at least 45 minutes.
This will let the glue dry so that the glitter sets.

7.
When the glitter it set, carefully unpeel the
masking tape, revealing a crisp straight line around your jar.
8.
Now you can add any decoration if you want to. I
love how the jars look with and without decoration, but adding to the does make
them look more professional and personalised. You can add whatever you want,
for example, stickers, Christmas decoration, ribbons or bows. I made one using
a holly card-making decoration and a red ribbon.

9.
Add a tealight and light on a festive night to
see the frosted look! I used a variety of unscented and scented tealights for mine, I would definitely recommend getting some scented ones from ikea, these vanilla ones are really strong for the price I paid.
And that’s all. I love this because it is so easy and
everyone can do it. I think the tealights are great for Christmas because they
look so wintery! I think they are a great gift idea and would be perfect for a
friend/ family member, as well as a neighbour/ teacher. You can change the DIY to suit you and play
around with the design to make it unique. Some extra ideas could be to change
the colour of the glitter, make snowflakes and stars spaces in between the
glitter and change decorations.

I hope you enjoyed seeing this festive DIY post, I would
love to see any of your creations- especially if you have a go at this one, so
leave your links down below. If you want to know more about me, I would love it
if you could ask me some festive questions on my Q&A page. I hope you all
have a wonderful day,

No comments:
Post a Comment